Healthy Relaxed Hair Week - How To Apply Your Relaxer Correctly

By . - Wednesday, July 09, 2014

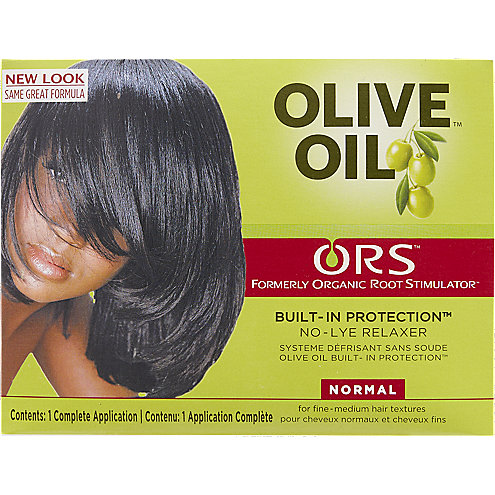
I will be using the ORS Olive Oil Relaxer as my example because I used it years ago when I was relaxed, and folks still seem to like it. Use what you like, but use it properly.

WARNING


  1. Do not apply relaxer directly to scalp. If relaxer comes into contact with skin, wipe off immediately using a damp cloth.
  2. Do not relax hair that is damaged, brittle, splitting or breaking. Follow all instructions to avoid skin and scalp irritation.


Step 1: Before Relaxing make sure you assemble everything you need for the relaxer service.  

Special Note:Before Relaxing everyone should protect their hairline and ears with petroleum jelly/ vaseline  because these are the most delicate areas that are easily irritated. However, if you have a sensitive scalp, make sure to part hair and apply the hair oil directly to the entire scalp (not the hair) before relaxing.

Step 2: Mixing & Strand Test Mixing: Put on latex gloves provided in kit. Pour Organic Root Stimulator Activator (B) into Organic Root Stimulator Base (A) and mix thoroughly. 

IMPORTANT: Do not apply to hair until completely smooth and without lumps. Mix for at least one minute or more. Failure to mix thoroughly may cause scalp irritation, hair damage, and/or hair loss. Strand Test: Cut a small section of hair from the back of head. Tape one end of the hair strands together. Apply relaxer evenly. Follow timing guide. If not straight enough, continue checking every 1-2 minutes until desired straightness is achieved. Examine strand test section and note timing. 

DO NOT exceed the maximum time on the timing chart based on hair texture (See timing chart in the Step-By-Step Guide included in kit).

Step 3: Application Apply relaxer close to the scalp, but not on the scalp. If this is a touch up, apply to new growth only.

Step 4: Smoothing Smooth the relaxer using the back of a comb or fingertips. Start smoothing where the relaxer was first applied (top of head). Continue throughout head in the order the relaxer was applied. Make sure that you don’t exceed your recommended time.

Step 5: Rinse Using warm water, thoroughly rinse the hair, especially around the ears, nape, and hairline. Rinsing is important to avoid damage and over-processing of your hair. After rinsing, you will notice that your hair will feel silky and tangle free.

Step 6: Neutralizing Apply a generous amount of Organic Root Stimulator Olive Oil Creamy Aloe Shampoo to the hair and work into a rich lather. Rinse, repeat shampoo. Leave on for 2-3 minutes. After rinsing, your hair will feel deep cleansed and tangle free! Towel-dry hair.

Step 7: Conditioning Apply a generous amount of Organic Root Stimulator Olive Oil Replenishing Pak Conditioner to the hair. The Replenishing Pak will fortify and balance the moisture and protein content in the hair, resulting in stronger and healthier-looking hair that is shiny and manageable. Put on a plastic cap and sit under a dryer for 10-15 minutes (or 45 minutes to an hour without heat). Rinse hair and towel dry.

Step 8: Styling Options Wrapping the hair is a wonderful way to achieve a straight style without using a lot of heat. Wrap the hair with Organic Root Stimulator Olive Oil Wrap/Set Mousse to leave hair looking smooth and silky. Roller-setting gives the hair body without using excessive heat. Roller set the hair with Organic Root Stimulator Olive Oil Wrap Set/ Mousse for more body and longer-lasting curls. Blow-drying is an easy way to dry the hair; however, it can cause breakage or damage to hair if it’s not done properly. Use the Organic Root Stimulator Olive Oil Incredibly Rich Hair Lotion to protect the hair from heat, add shine, and soften hair.

Need some visual instructions? No problem! Check out this video from my favorite relaxer on the market, ORS Olive Oil Hair Relaxer.


source
source

Have a Good Hair Day and remember to Love Your Hair!!!

  • Share:

You Might Also Like

0 comments

Leave a comment and show some love!